
This article talks about Complete Roadmap from Zero to Production of Call Queue in Microsoft Teams
Call Queue
Call queues in Teams offer a fourth way: automated, intelligent distribution of calls to your actual team members, right inside the collaboration platform they already use.
The benefits compound:
- Customers get connected faster
- Your team stays in their workflow (calls come through Teams)
- You get visibility into call metrics
- You can modify routing in minutes, not weeks
The Five Working Pieces
1. The Receiving Point
This is where calls enter the queue. Usually routed from an Auto Attendant menu, but can also be a direct phone number.
2. The Agent Pool
The actual people (or distribution lists of people) who will answer calls. These are regular Teams users with phone licenses.
3. The Distribution Logic
How the queue decides who gets the next call. Should it go to whoever answered last call (round-robin)? Whoever’s been idle longest? Someone specific?
4. The Holding Pattern
What happens while the caller waits. Music on hold, position announcements, estimated wait times—all designed to prevent abandonment.
5. The Escape Route
What happens when the queue is full, everyone’s busy, or someone has waited too long. Route to voicemail? Another queue? A person?
The Prerequisites Conversation: What You Actually Need
Before we talk implementation, let’s be honest about what your organization needs to be ready.
The Licensing Reality
Microsoft’s licensing for Teams voice is complex, and I’ll cut through the confusion:
The Essential License: Microsoft Teams Phone System
This is non-negotiable. Every organization using call queues needs this. It’s the foundation that makes everything else possible. Cost varies depending on whether you’re buying it standalone or bundled with Microsoft 365.
The Connectivity License: Either Calling Plan, Direct Routing, or Operator Connect
You need a way for calls to get into your system. Think of it as the “telephone line” in the cloud era.
- Calling Plan: Microsoft provides the phone number and PSTN connection
- Direct Routing: You bring your own SIP trunk
- Operator Connect: A carrier provides the integration
The Workhorse License: Resource Account License
Each Call Queue needs its own Resource Account (a special non-person account). These are either free or part of your Teams Phone license, depending on your setup.
The Agent License: Teams Phone System on each agent
Every person who answers calls from the queue needs a phone license. They’re using Teams as their phone system.
The Technical Prerequisites (The Boring But Important Stuff)
- Access to Teams Admin Center with appropriate permissions (realistically, Teams Administrator role or Voice Administrator role)
- Azure AD synchronized and functioning
- At least one Auto Attendant already configured (technically optional, but practically necessary)
- A group or distribution list that defines who your agents are
- At least one phone number available (the queue’s “phone number”)
The Organizational Readiness Check (The Easy-to-Overlook Stuff)
Here’s what often gets missed: technical readiness isn’t the same as organizational readiness.
Before building your call queue, ask yourself:
- Do we know how many calls we get daily? At what times? (No guessing)
- Have we identified who will answer these calls? (Named people or distribution lists)
- Do we have documented processes for different call types? (You can’t route what’s not defined)
- Do we know what our target answer time is? (If you don’t know what “good” looks like, you can’t build for it)
- Do we have a manager or owner for this call queue? (Someone has to monitor it)
These questions matter more than the technical prerequisites. You can have perfect licensing and still fail if the organization isn’t ready.
The Architecture You Need to Understand
Call Queues don’t exist in isolation. They’re part of a larger voice architecture in Teams. Understanding this prevents a lot of configuration mistakes.
How Calls Flow Through Your System
Here’s the journey a typical inbound call takes:
Incoming Call (from PSTN)
        ↓
   [Phone Number]
        ↓
[Auto Attendant answers]
   (plays greeting, offers menu)
        ↓
[Caller presses key or says something]
        ↓
[Auto Attendant decides routing]
        ↓
[Call enters Call Queue]
        ↓
[Queue evaluates agent availability]
        ↓
[Queue routes to available agent]
        ↓
[Agent answers in Teams client]
        ↓
[Agent handles call]
        ↓
[Call ends or transfers to another queue]
Notice that Call Queue only appears in step 5 onward. Steps 1-4 are Auto Attendant’s job. This is why Auto Attendant and Call Queue are always mentioned together—they’re a team.
Resource Accounts: The Behind-the-Scenes Players
This is where many people get confused, so let me explain it clearly.
A Resource Account is a special type of user account in Azure AD that doesn’t represent a real person. Instead, it represents a service or function. In this case, it represents your Call Queue.
Why does your Call Queue need its own account?
Because it needs:
- An identity in your organization
- A phone number assigned to it
- Settings and permissions
- Call history and reporting
A Resource Account provides all of this.
Think of it like this: A Call Queue is a service, but services need accounts just like people do. The Resource Account is that account.
The Step-by-Step Build: From Nothing to Working Queue
Now we get to the actual building part. I’m going to walk you through this the way I do it in real implementations.
Phase 1: Create Your Resource Account (This Is the Foundation)
This has to be done first because everything else depends on it.
Using Teams Admin Center:
- Go to admin.teams.microsoft.com
- Navigate to Voice → Org-wide settings → Resource accounts
- Click the “+ Add” button
- You’ll see a form with these fields:
- Display name: “Technical Support Queue” (make it descriptive)
- Username: “techsupport” (lowercase, no spaces, this becomes part of the email)
- For “Resource account type,” select “Call Queue”
- Click Add
The system creates your resource account. It’s now ready to be used, but it doesn’t have a phone number yet. We’ll assign that later.
Using PowerShell (If You Prefer Scripts):
# First, connect to your Microsoft Teams environment
Connect-MicrosoftTeams

# Define your values
$displayName = "Technical Support Queue"
$username = "techsupport"

# The application ID for Call Queue (this is universal, don't change it)
$appId = "11cd3e97-eb45-4628-aec2-d3ad8e25910d"

# Create the resource account
New-CsOnlineApplicationInstance `
  -UserPrincipalName "$username@microbrother.com" `
  -DisplayName $displayName `
  -ApplicationId $appId

# Verify it was created
Get-CsOnlineApplicationInstance -Identity "$username@microbrother.com"
Either way works. Use whichever is easier for your team.
Phase 2: Define Who Will Answer These Calls (The Agent Group)
Before you can create the queue, you need to decide who will answer calls.
You have two options:
Option A: Individual Users
List specific people. Good for small teams where you know exactly who should answer these calls.
Option B: Distribution Group
Create a group in Azure AD that contains the people. Good for larger organizations where group membership changes or you want flexibility.
I recommend Option B for anything larger than 5 people because it’s more maintainable.
If you’re using a distribution group, create it now:
- Go to Microsoft 365 admin center
- Groups → Active groups
- Create a new Security Group or Distribution Group
- Add members who will answer calls
- Note the group email address (you’ll use this in the next step)
Phase 3: Create the Call Queue Configuration (Where the Magic Happens)
Now you’re creating the actual Call Queue that will distribute calls.
In Teams Admin Center:
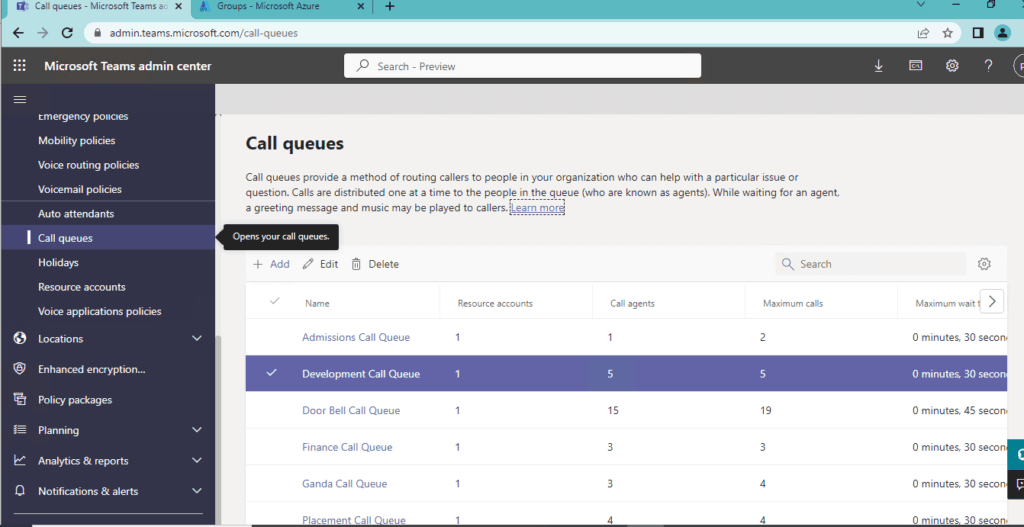
- Go to Voice → Call queues
- Click “+ New call queue”
- You’re now in the configuration wizard. Let’s go through each section:
Section 1: Basic Information
- Name: Something clear like “Technical Support Queue” or “Sales Inquiries”
- Add agents: This is where you add the people or distribution groups who will answer
Click “Add agents” and search for:
- Individual users by name, or
- Your distribution group by name
Select them and they’re added to the queue.
Section 2: Call Routing Method (This Is Important)
This determines how the queue decides who gets the next call. Pick one:
Longest Idle
Routes to whoever has gone the longest without answering a call. This is the fairest method for most situations because it naturally distributes the load evenly.
Example: Alice answered the last three calls. Bob has been idle for 10 minutes. Next call goes to Bob.
Round Robin
Just cycles through agents in order. Simple, predictable, but not always fairest if agents have different call lengths.
Example: Calls go to Alice, then Bob, then Carol, then back to Alice.
Serial
Tries to give all calls to the first agent. If they’re unavailable, tries the second agent, and so on. Only used in specific scenarios.
Example: All calls go to Alice until she’s unavailable. Then Bob gets them. Then Carol. Then back to Alice when she’s available.
Attendance-Based
Routes based on a percentage you define. You might say “Alice gets 40% of calls, Bob gets 60%” based on experience or skill level.
My recommendation for most teams: Use “Longest Idle.” It’s fair, distributes evenly, and doesn’t require ongoing adjustment.
Section 3: Presence-Based Routing (Enable This Unless You Have a Reason Not To)
This is a critical setting that many people overlook.
What it does: Only routes calls to agents whose Teams status shows they’re available.
Specifically:
- “Available” status → Gets calls
- “Busy” status → Doesn’t get calls
- “Do Not Disturb” status → Definitely doesn’t get calls
- “Away” or “Offline” status → Can’t get calls
This prevents calls from interrupting agents who are in meetings, on other calls, or focusing on important tasks.
Enable this. Really. Your agents will thank you.
Section 4: Conference Mode
Leave this enabled (it usually is by default). This allows agents to speak to each other before bringing the caller in. Useful for quick consultations or warm transfers.
Section 5: Call Answering Options
These settings determine what types of calls the queue accepts:
- Accept calls from PSTN (regular phone callers): Usually yes
- Accept calls from Teams users: Depends on your setup
- Accept calls from organizational auto attendants: Usually yes
For a typical call queue that receives external calls, just make sure PSTN is enabled.
Phase 4: Configure What Happens While Callers Wait (Hold Music and Announcements)
This is the caller experience part. Don’t skip it because callers’ perception of wait time is heavily influenced by what they hear.
Music on Hold:
You have two options:
Option 1: Use Teams’ default hold music. It’s professional and fine for most situations.
Option 2: Upload your own audio file.
- File format: MP3 or WAV
- Maximum length: 5 minutes
- Good choices: Royalty-free instrumental music, gentle corporate music, or even a brief recorded message
Where to get audio:
- Free sites: Pixabay, YouTube Audio Library
- Paid services: Epidemic Sound, Artlist (they have business plans)
- Professional recording: If you want something branded, hire someone
My advice: Use a professional-sounding file even if it’s short. A badly recorded audio file makes you sound unprofessional.
Caller Notifications:
You can enable announcements that tell callers:
- “You are call number 2 in the queue”
- “Your wait time is approximately 3 minutes”
- Periodic updates about their position
These actually reduce abandonment because callers know they haven’t been forgotten.
Phase 5: Configure Overflow and Timeout (The Safety Valve)
These settings define what happens when things go wrong (queue gets full, everyone’s busy, or wait gets too long).
Overflow Handling: What happens when queue gets too full
Set a maximum queue depth (number of calls). When you hit that limit:
- Disconnect the call → They hang up. Bad option.
- Send to another Call Queue → Route to a backup queue. Good option if you have one.
- Send to a person → Route directly to a manager or supervisor.
- Send to an Auto Attendant → Play a different menu.
- Send to voicemail → Let them leave a message.
I recommend sending to voicemail because it’s reliable and doesn’t lose the caller.
Timeout Handling: What happens if they wait too long
Set a maximum wait time (usually 5-10 minutes for most businesses). When time runs out:
Use the same five options above. Again, I recommend voicemail as the fallback because it’s predictable.
Phase 6: Assign a Phone Number (If Direct Routing Needed)
Most call queues don’t get a direct phone number—they’re reached through an Auto Attendant menu option. But if you want people to call the queue directly, assign a number.
To assign a phone number:
- Go to Voice → Phone numbers
- Find an unassigned phone number
- Click it and select Edit
- Under “Assign to,” select your Call Queue’s resource account
- Save
The queue now has a phone number people can call directly.
Phase 7: Test It (Seriously, Actually Do This)
Before you announce it to your organization, test the entire flow:
- Call the queue from an external phone
- Verify the greeting and hold music
- Verify hold music plays while waiting
- Have an agent accept the call
- Test that the call routes correctly
- Verify caller can hear the agent
- Test what happens when all agents go offline (overflow routing)
- Test the timeout action after waiting (usually get routed to voicemail)
Write down what you observe. Does it match what you expected? If not, go back and adjust the configuration.
The Configuration Decisions That Actually Matter
You can follow steps perfectly and still end up with a call queue that doesn’t work for your organization. These are the decisions that separate good queues from bad ones.
Decision 1: Routing Method
Most people pick Longest Idle because it sounds fair, and they’re right. It is fair. But here are the edge cases:
Pick Round Robin if:
- All your agents have similar experience level
- Call lengths are pretty consistent
- You want maximum simplicity
Pick Longest Idle if:
- Agents have different call-handling speeds
- You want to naturally balance workload
- You value fairness
Pick Serial if:
- You have a primary person who should handle most calls
- Only use secondary/tertiary people as backup
- Rarely needed in modern environments
Decision 2: Presence-Based Routing On or Off?
You should enable this unless you have a very specific reason not to. Reasons you might disable it are rare.
Reasons to enable it (99% of cases):
- Prevents interrupting busy agents
- Agents stay in control of their availability
- Improves agent satisfaction
- Doesn’t hurt call routing
Just make sure agents understand they need to keep their status accurate.
Decision 3: Where Does Overflow Go?
This is crucial because it determines your fallback behavior. Think about what’s actually best for your business:
- Voicemail: Safe choice. Caller leaves a message, you follow up.
- Another queue: Only if you have a legitimate overflow queue.
- A person: Only if that person is willing to handle it.
- Auto Attendant: Only if you want them to choose another option.
Most organizations should use voicemail.
Decision 4: Hold Music or Silence?
This seems trivial, but it’s not. Silence makes wait times feel twice as long as they actually are.
Even bad hold music is better than silence. Professional hold music is better than mediocre hold music.
Invest 30 minutes finding or creating professional hold music. Your callers’ perception of your organization depends on it.
Decision 5: Who Are Your Agents, Really?
Before you add people to the queue, actually think about who should be there.
Common mistake: Add everyone in the department because they can theoretically answer calls.
Better approach: Add only people who are actually trained to handle these calls and willing to take them.
If you add someone who doesn’t want the calls or isn’t trained, your queue becomes a frustration point.
Common Configuration Mistakes and How to Avoid Them
After setting up dozens of call queues, I’ve seen the same mistakes repeatedly. Here are the big ones:
Mistake 1: Presence-Based Routing Enabled But Agents Don’t Understand Status
What happens: Calls don’t reach agents who appear offline or away.
Agents get frustrated thinking the queue is broken. It’s not. The agents just aren’t marked as Available.
The fix: Train agents that their Teams status determines whether they get calls. Seriously teach this.
Mistake 2: Agents Added to Queue But Not Licensed for Calling
What happens: Calls come in, queue tries to route, agents can’t receive them.
You see errors about unlicensed users in the logs. The queue seems broken. It’s not the queue.
The fix: Before adding anyone to a queue, verify they have Teams Phone System licenses and are set up for calling.
Mistake 3: No One Monitoring the Queue
What happens: Queue gets full, timeout actions fail, no one notices. Callers abandon calls.
Days later you realize the queue’s been broken.
The fix: Designate someone to monitor the queue. Set up regular reporting. Check metrics.
Mistake 4: Overflow or Timeout Routes to a Person Who Doesn’t Know
What happens: Overflow calls route to someone not prepared to handle them. They get frustrated.
The fix: Tell that person they might get overflow calls and train them on how to handle it.
Mistake 5: Hold Music That Sounds Unprofessional
What happens: Your organization sounds like a pizza place from 1992.
Callers form negative impressions within the first 10 seconds of hold music.
The fix: Spend 30 minutes finding professional audio. It matters.
The Monitoring Part: You Can’t Improve What You Don’t Measure
Setting up a call queue and then ignoring it is like installing a car and never checking the oil. It works until it doesn’t, and then it’s a mess.
You need basic monitoring. Here’s what actually matters:
The Three Metrics You Care About:
- How many calls is the queue getting? If it’s drastically more or less than you expected, something’s changed in your business.
- What percentage of calls get answered? If it’s dropping, you might need more agents. If it’s rising, maybe fewer.
- How long are people waiting? If wait times are climbing, you’re understaffed. If they’re dropping, you’re overstaffed.
Where to find this data:
Teams Admin Center → Analytics & reports → Call queue analytics
You’ll see a dashboard with graphs and numbers. Look at weekly trends. Is the queue getting busier or less busy? Are abandonment rates increasing?
What to do with the data:
- Weekly: Glance at metrics. Is anything obviously broken?
- Monthly: Look at trends. Are we getting busier? Do we need to hire?
- Quarterly: Deep analysis. Should we restructure the queue?
This takes 30 minutes a month. It prevents problems.
Scaling Your Call Queues As You Grow
Small organizations usually start with one queue. As you grow, you’ll need more.
Here’s how to scale without chaos:
From One to Many
When you have multiple departments, create separate queues:
- Sales Queue
- Support Queue
- Billing Queue
- HR Queue
Each has its own agents and settings.
Route people through Auto Attendant menus to the right queue.
This is much better than one huge queue with 20 people in it.
The Hub-and-Spoke Model
Some organizations use a central queue with overflow to specialized queues:
[Incoming Call]
        ↓
   [Auto Attendant]
        ↓
[General Queue]
(can answer any inquiry)
        ↓
[If queue full, route to]
   [Specialized Queues]
(Sales/Support/Billing)
This works when you have generalists who can handle most calls and specialists for specific issues.
The Skills-Based Approach (Workaround)
Teams doesn’t have native skill-based routing, but you can approximate it:
Create different queues for different skill areas. Route through Auto Attendant based on what the caller needs, not their account.
Agent with advanced billing skills? Add them to the “Billing Queue” distribution group.
This isn’t automatic, but it works.
Troubleshooting: When Your Queue Stops Working
Sometimes queues break. Usually it’s not catastrophic, but it needs fixing.
Scenario 1: Calls Route to Queue But Agents Don’t Receive Them
Diagnosis steps:
- Check if agents are marked as Available in Teams
- Verify presence-based routing isn’t preventing routing
- Confirm agents have phone licenses
- Check if someone went offline and the queue is now undersized
Usually the fix:
Have agents set their status to Available. They might all be in “Do Not Disturb.”
Scenario 2: Callers Hear Wrong Hold Music or No Music
Diagnosis steps:
- Check the queue’s hold music settings
- Verify the audio file exists (if using custom file)
- Call the queue again and listen
Usually the fix:
Re-select or re-upload the hold music file. Sometimes the connection fails.
Scenario 3: Overflow Isn’t Working
Diagnosis steps:
- Verify overflow is configured
- Check that the overflow destination (voicemail/queue/person) exists
- Call the queue, get it full, verify overflow action
Usually the fix:
The overflow destination doesn’t exist. If you’re routing to another queue, verify that queue exists.
The Advanced Stuff (If You’re Ready)
Once your basic queue is running, you can get fancier.
Using Call Queue with Auto Attendant Menus
This is the real-world use case:
Main number rings
     ↓
Auto Attendant greets caller
"Press 1 for Sales, 2 for Support, 3 for Billing"
     ↓
Caller presses key
     ↓
Appropriate queue receives call
     ↓
Agent answers
This setup uses both Auto Attendant and Call Queues together, each doing what it’s best at.
Tracking Call Queue Metrics with PowerShell
If you need deeper analytics than the admin center provides:
# Get all queues and their status
Get-CsCallQueue | Select-Object DisplayName, State

# Get specific queue details
$queue = Get-CsCallQueue -NameFilter "Support Queue"
$queue | Select-Object *

# List agents in a queue
$queue.Members | ForEach-Object {
  Get-CsOnlineUser -Identity $_ | Select-Object DisplayName, UserPrincipalName
}
This helps if you’re doing custom reporting or automation.
Integrating with CRM Systems
Some organizations connect call queue calls to their CRM, so agents see customer information when the call arrives.
This requires integration between Teams and your CRM (Dynamics 365, Salesforce, etc.) using Power Automate or direct API calls.
It’s worth doing because it makes agents far more effective, but it requires technical setup.
The Real Talk: Call Queues Aren’t Magic
Here’s what I’ve learned after implementing call queues in 40+ organizations:
Call queues don’t solve bad service. They don’t make untrained agents better. They don’t fix broken processes.
What they do:
- Distribute calls fairly
- Show you metrics about your operation
- Make it easy to reach the right person
- Prevent calls from getting lost
If you combine a well-configured call queue with:
- Trained agents
- Clear processes
- Management attention
- Continuous improvement
Then you get excellent call handling.
If you just set up a queue and ignore it? You’ll have faster abandonment of calls, frustrated agents, and a system that looks good on paper but doesn’t work in practice.
The technology is only part of the solution.
Checklist: Implementation in Order
Use this to implement a call queue systematically:
Week 1: Planning
- [ ] Determine call volume and times
- [ ] Identify agents who will answer
- [ ] Decide routing method
- [ ] Pick hold music
- [ ] Define overflow behavior
Week 2: Setup
- [ ] Create resource account
- [ ] Create distribution group for agents (if using one)
- [ ] Create call queue configuration
- [ ] Assign phone number (if direct routing needed)
- [ ] Connect to Auto Attendant menu (if applicable)
Week 3: Testing
- [ ] Call from external phone, verify routing
- [ ] Verify agents receive calls
- [ ] Test overflow behavior
- [ ] Test timeout behavior
- [ ] Document what you observe
Week 4: Launch and Monitor
- [ ] Announce to organization
- [ ] First week: monitor closely
- [ ] Train agents on status management
- [ ] Establish monitoring routine
- [ ] Weekly review of metrics
Closing Thoughts
Call queues in Microsoft Teams are deceptively simple on the surface. You create a queue, add people, configure routing, and calls get distributed. Done.
But the difference between a queue that works and a queue that works well is in the thinking you do before you build it and the attention you give it after.
The organizations I’ve worked with that have the best call handling experiences aren’t the ones with the most complex queues. They’re the ones that:
- Thought clearly about what their callers need
- Set up simple, straightforward routing
- Invested in professional hold music
- Trained their agents
- Actually looked at the metrics and made adjustments
Those organizations use Teams Call Queue as a tool that’s invisible to their customers because it works so well.
That’s the goal. Build your queue to serve your business and your customers, then pay attention to it. Your organization will be better for it.
Conclusion:
Post reading above article reader will be able to create and manage Call queue in Microsoft teams
Also you can read https://microbrother.com/create-microsoft-teams-auto-attendant-like-a-pro/ this article to create Auto attendant in MS Teams
Thank you 😇